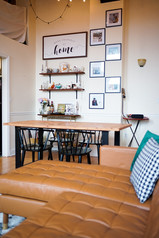
Want the custom look without the price tag? We made this table for under $300, it took a few weekends of working around our social activities but overall this was a relatively easy project. Check out the process below!

Supply List
1/4 inch piece of plywood
2x4's for support and legs
1x6's for the herringbone pattern
1x2's for framing around the table
framing nails
2 1/2 inch wood screws
1 inch wood screws
Paint Brush
Matt Black Paint
Rubio Monocoat Stain, Color: Bourbon

Tools Needed:
Nail Gun (optional: could substitute with a hammer, but more time consuming)
Instructions:
Cut your piece of plywood to the desired size of your table. (Ours is 6 feet by 3 feet). Fasten 2x4's to the bottom of the table top for support, we also added left over 1x2's from the framing to be corner braces within the support rectangle.

Place your 1x6's in the herringbone pattern and nail or screw them into your piece of plywood. There are two options to secure the herringbone design to your table top:
1. Nail the 1x6's from the top and later cover the nail holes
2. Use screws from underneath the table to secure them to the piece of plywood without creating any holes on the top (this way is more tedious but the option we went with)..

After the 1x6's are secured, cut off the remaining edges so they're flush against the plywood.


Cut and Attach Legs: We wanted our table to be around 32 inches tall so we cut our legs 31 inches long. Attach another 2x4 to each set of legs, creating a square shape that provides more support and gives a customized look to the table.


Add Framing: Cut your 1x2's to the length of each edge, and make diagonal, 45 degree cuts so they fit flush together. Use framing nails to secure them to the table top.

Add wood filler in all the spaces within the herringbone pattern and in between the framing edges.

Sand down, repeat with more wood filler until all gaps are completely filled, sand again.

After the table is completely sanded down, it's time for paint and stain.

We painted our legs matt black (thank you to all my story people for your input on deciding to paint them black, I'm so glad I did)!

We used Rubio Monocoat (which was a bit more expensive than your average stain from Home Depot, but it is worth the extra cost). I chose the color Bourbon, I wanted a richer stain, and this color enhanced the warmer tones without looking orange-y or yellow-y at all. Rubio Monocoat is a stain and oil finish. It's hardwax oil protects and colors interior wood in one single layer. This way you get durable protection, need less time to treat your wood and can easily maintain your wood in case of repairs or renovations.
Style as desired. Here is our finished product! We chose these black wishbone chairs to style with it and fresh flowers are a must in this household.
We hope you enjoyed this project, let us know what you think of it in the comments!
Cheers,
Mr and Mrs Jones


コメント